
In this article, I will show you how to keep an electric guitar in tune and explain everything that can cause tuning problems. With the proper routine maintenance and adjustments, your guitar will stay in tune, even when you are not playing it, to always sound great. You don’t need to have experience in guitar setups or repairs to do most of the basic procedures listed below.
Why Electric Guitars Go Out Of Tune
Does your favorite axe keep going out of tune no matter what you try? Before you trade up for something less annoying, you can do some simple things that will make a big difference. Although many things can make your electric guitar misbehave, most of the time, it’s just for a few common reasons.

The solution is usually is fairly straightforward and easy to remedy. You need a few simple tools and a little instruction. Acoustic guitars can be more complicated but generally have tuning issues for many of the same reasons.
When working on your guitar, it’s important to know when a problem needs to be looked at by a qualified repair person so that you don’t do more harm than good. Do not attempt to make any adjustments or repairs if you do not know what you are doing or you can permanently damage your instrument!
Selecting A Guitar Tuner
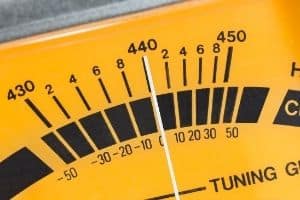
There are many digital guitar tuners that you can buy. If you already have one and it works reliably, then there is no need to upgrade.
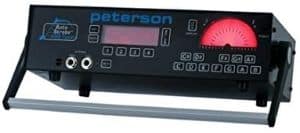
Any commonly available digital tuner is accurate enough to tune your guitar and perform setups. You do not need a professional guitar tuner, like a Petterson, unless you’re doing professional guitar setups for a living.
If you are setting up the action, intonation, neck relief, etc., on your guitar, then what’s important to remember is to tune it in the playing position, not lying flat on your workbench. This is a common mistake, and players often think they need a better tuner when they don’t get the results they are after.
How To Examine Your Guitar Systematically
When you have a tuning problem, the best approach is to examine your guitar systematically. Begin by inspecting the top (or headstock) of the guitar and work your way down to the bridge. This is also an excellent approach for routine maintenance. If you inspect and maintain your guitar regularly, then your tuning problems will usually disappear for good.
Here is my top-down approach. Use it and you will not miss anything in the process.
Headstock
The headstock of your guitar is where the strings are attached to the tuning machines. You need to inspect the following areas that can commonly cause tuning problems.
Tuning Machines
The tunning machines (AKA guitar tuners) allow you to wind your strings to make them tighter or looser. They can be all on one side like a Stratocaster or both sides of the headstock like a Les Paul.
Check to be sure that each of the tuning machine nuts on the top of the headstock is tight. The tuning machines can have screws on the underside of the headstock that can also loosen. A loose nut or screw can affect the stability and proper function of the tuning machine.
The nut and screws on a tuning machine can be tightened with a wrench and screwdriver, respectively. Be careful not to overtighten them, or you could damage the tuning machine or headstock.
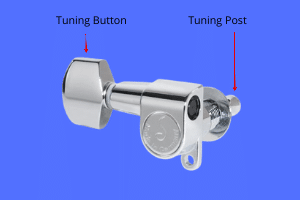
Tuning Machine Button
The tuning button(see the image above) has a screw on the side that keeps it snug up against the post that it’s attached to. If the button is loose, there will be too much play in the button as you turn it in either direction to tighten or loosen the string. This can make tuning “sloppy” and less accurate. If the button is too tight, it will be too difficult to turn it a small amount, affecting tuning accuracy.
To correct this, adjust the tightness of the tuning button screw so that it allows the button to turn easily but keeps it firmly seated. After the button tension is properly adjusted, you will find it easier to tune up or down to pitch without overshooting, which can put string slack between the tuning machine and the nut.
Tuning Machine Post
The tuning machine post is where the string is wound up to put tension on it and adjust it to pitch. For good tuning accuracy, it’s important to “lock” the string and keep each winding from overlapping the adjacent turn as you install a fresh string.
If a string is too long, then there will be too many windings on the tuning post, and they will overlap each other, which makes tuning less stable. See the video below for more info.
Related Article ➡ Are Locking Tuners Worth It? – An Eye-Opening Assessment!
String Trees
Your headstock may have one or two string trees for the high E and B strings. String trees help to keep downward tension on the strings to keep them firmly seated in the nut. If you have tuning machines with staggered-height tuning posts, then you will not need string trees.
The problem with string tress is that they can create string friction and affect your tuning accuracy. To correct this problem, apply a small amount of thick lubricant (see the section below on guitar lubricants) to the undersurface of each string tree where it contacts the string.
Neck
The guitar neck has many parts that can potentially cause tuning problems. Examine each area carefully on a workbench and while you are playing the instrument.
Nut
The guitar nut holds each string at the proper height and spacing. It also transmits the sound of each vibrating (picked) string into the guitar neck to create sustain. A properly set up nut is critical to the guitar’s sound and performance. Worn out or chipped nuts can cause tuning problems and are always a cause for concern.
Nuts come in four configurations, classic, self-lubricating, roller, and locking. “Specialty” nuts are designed to help avoid a tuning problem for a particular type of guitar.
Classic Nut
This is your basic nut, made from materials like bone, plastic, nylon, or brass. Each material is selected based on considerations such as cost and function. The problem with a basic nut is that it creates friction points between the nut and strings.
This type of nut needs to be lubricated to overcome friction and improve tuning, especially if your guitar has a whammy bar. It doesn’t usually take much lubricant. You can use a pencil to color in each nut slot with graphite.
Self-lubricating nut
Self-lubricating nuts are made of graphite, TUSQ, or other low-friction materials. These nuts are popular because they never require lubricating maintenance and work pretty well with a standard whammy bar setup if not used too aggressively.
For more info, see TUSQ XL Nut Review – Make Your Guitar Sing Like A Canary!
Roller Nut
Roller nuts lower friction by using a smaller “roller” for each string. If a string’s tension changes during playing, it will roll in either direction over the nut and keep the tuning stable. The most popular nut is the Fender LSR nut.
A Roller nut will usually allow more aggressive whammy bar use than a self-lubricating nut without creating a tuning problem. Roller nuts may cause a decrease in the tone quality or natural sustain of the guitar because of the nut’s mechanical design.
Locking Nut
Locking nuts are best for minimizing tuning problems because the strings are locked into the nut and cannot move in either direction during guitar use. They are typically found on guitars with Floyd-Rose-type locking bridges.
A locking nut will not cause a tuning problem, even with very aggressive whammy bar “dive bombs.” String changes with a locking nut are more time-consuming, which can be especially problematic if a string breaks during a show.
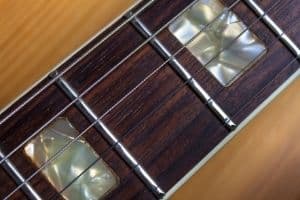
Frets

The frets on your guitar neck can cause tuning problems if they are not properly installed or as they begin to wear out. If one fret is higher or lower than others, not “crowned” correctly, or has dips in it from long-term use or bending, you will most likely have tuning issues.
Dirty frets can also be problematic because they can hamper the string’s vibration. If your guitar neck looks dirty, then your frets are dirty too.
Most guitar frets are made from nickel, but some of the more expensive guitars have stainless steel frets. Nickel frets are softer and wear out quicker than stainless frets, especially if you do not use a nickel wound string set.
Related Article ➡ Jumbo Vs Medium Jumbo Frets – Find The Perfect Size For You!
Neck Joint With Bolt-On Necks
If your electric guitar’s neck bolts onto the guitar body instead of being glued in, this can cause tuning stability problems. Most guitar necks are attached with 4 bolts, although some of the early seventies Strats were attached with 3 bolts.
To eliminate tuning problems, make sure that the bolts are tightly screwed into the neck plate. A loose neck can “rock” back and forth on the guitar body, causing the tuning to go sharp or flat. If the bolts do not stay tight, then you most likely have stripped the bolt threads in the neck, or the neck plate might not be perfectly flat.
Acoustic guitar neck joints have their own tuning issues and will not be discussed here.
Truss Rod
The truss rod is a steel rod (sometimes two rods) in a guitar neck is that is used to keep the neck from bending under the tension of the strings and to set the “relief (amount of dip)” in the neck. If the truss rod is not adjusted correctly, it will affect the guitar’s intonation (ability to be in tune up and down the neck), as well as its playability.
The truss rod may require seasonal adjustment as the climate changes. Never attempt to adjust your truss rod unless you are familiar with the process; otherwise, you might cause permanent damage to your neck.
The amount of neck relief is typically set according to guitar type and player preference. Generally speaking, here is the relief that I use for my guitars, as measured from the 8th fret. I like more relief in smaller radius fretboards, but it’s just my personal preference.
You may find that .010″ is on the high side for you, but sometimes I use it on Fender Strats and Teles; otherwise, I use .009 inches. Avoid fret buzzing, which can throw off the tuning and intonation.
| Neck Radius (inches) | Relief (inches) |
|---|---|
| 7.25″ (Fender) | .010″ |
| 9.25″ to 12″ | .009″ |
| 15″ to 17″ | .008″ |
Strings
Strings can cause significant tuning problems, but this is one of the easiest problems to prevent or remedy.
Old Strings
Strings that are too old or too “well-played” are probably the most common tuning problem. When guitar strings begin to age, they can build up “gunk” on the surface and underneath the string. They also develop “metal-fatigue” as the string is repetitively stretched. An old string does not vibrate correctly when picked, which changes its pitch and overall sound quality.
Get in the habit of changing your strings often, especially if you play your strings hard or have sweaty hands. You can usually hear when it’s time to change strings because they lose their brightness and harmonics. Old strings go out of tune easily and may also affect the guitar’s intonation.
It’s important to try different types of strings until you find the ones that work best on your guitar or with your playing style. “Coated” strings typically last longer and sound better but are more expensive. Always carry an extra full set of strings with you in case a string causes tuning problems or breaks.
Incorrectly Wound Strings

Strings that are incorrectly wound on the tuning post during the installation process can cause tuning problems. Cut each string to the appropriate length to avoid overwinding. Lock the string during the first wind unless you have locking tuners or vintage-type tuning machines that thread the string end through the center of the tuning post.
See the video below if you don’t know how to do it. It’s one of the most things you can do to help with keeping your guitar in tune.
For more info, see How To Fix Guitar String Problems – Easy Things You Can Do!
Stretching Strings
After you change your strings and tune to pitch, it’s best to stretch them before playing to ensure stability. Gently pull up on each string over the fretboard, starting at the third fret using your thumb and index finger and moving down towards the bridge. You can pull up a litter harder when you reach the 12th fret.
You may need to repeat this process on each string a few times. Check the tuning after each stretch. When your guitar stays in tune, then the process is completed.
Changing The String Size (Gauge)
The string gauge that came on your guitar from the factory is the ideal size for the way your guitar nut was cut. You can go up or down about on a string gauge without affecting tuning stability, or maybe even two gauges, depending on the guitar and string brand.
Too large or small a string size change can cause problems at the nut and change the neck relief. If you are going up in size, then the nut slots can be filed bigger (with special files only!). If you are going down in gauge, then you might need to replace the nut.
Neck intonation problems can usually be corrected by adjusting the truss rod. The truss rod may need to be tightened with larger gauge strings and loosened with a smaller gauge.
Here’s an excellent video from Gibson TV that shows you some of the best ways to install and stretch new strings on your guitar.
Pickup Height
Pickup height can affect tuning by changing the degree of magnetic string pull. If the pickup is too close to the string, it will dampen its vibration a noticeable amount, and the guitar will sound out of tune with less sustain.
Players who use single-coil pickups tend to set their pickup height too high, especially if used to playing guitars with humbucking pickups.
If your bridge saddle settings and neck relief are ok and your guitar is still out of tune at different spots along the neck or you need to move your bridge saddles too much in one direction for one string compared to others, then you most likely have a pickup height problem.
Pickup height should always be set to the “sweet spot” that gives the best tone, not the loudest sound. If your pickups are not overdriving your amp, it’s best to use an overdrive pedal or distortion box. Alternately, you can use that guitar through an amp that has a master volume control. See Dr. Z Z Wreck Jr 1×12 Combo Review – Can You Say “Awesome”? and Blackstar Fly 3 Review – You won’t really believe your ears!
A pickup that is too close to a string can also create an unnatural out-of-tune sounding note called a “wolf tone.” To eliminate it, back the pickup slowly away from the string until it disappears.
Here are the pickup height measurements that I generally use for a variety of pickup types. I measure the height of the 1st and 6th strings from the pickup while fretting each string at the highest fret.
| Pickup Type | 6th String (Bass) | 1st String (Treble) |
|---|---|---|
| Fender Texas Specials | .12″ | .09″ |
| Fender Vintage Style | .09″ | .08″ |
| Fender Noiseless Series | .12″ | .09″ |
| Standard Single Coil | .08″ | .06″ |
| Humbuckers | .06″ | .06″ |
| Lace Sensors | As Close As Desired (allowing for string vibration) | As Close As Desired (allowing for string vibration) |
| EMG Sensors | As Close As Desired (allowing for string vibration) | As Close As Desired (allowing for string vibration) |
| Samarium Cobalt Noiseless (SCN) | As Close As Desired (allowing for string vibration) | As Close As Desired (allowing for string vibration) |
For more info on pickup types, see Fender Custom Shop Stratocaster Pickups – Which Set Is Best?
Bridge
Guitar bridges come in all shapes, sizes, and configurations. They can run the gamut from very simple to complex. Bridges on electric guitars are generally more complex than on acoustic guitars.
The more parts a bridge contains, the more it can affect your instrument’s tuning and sound, generally speaking. It’s important to get to know the specific adjustments and maintenance that your guitar bridge requires. Check it each time you go through the tuning diagnostics in this article.
Bridge Configuration
Electric guitars bridges will have either a fixed bridge or a vibrato bridge. Sometimes the bridge can be set to function as both fixed and vibrato, like on a Parker Fly Deluxe guitar. This option allows you to use the guitar both ways and makes restringing the guitar quicker and easier.
Most of the tuning problems with both types of bridges are from misadjusted bridge saddles and bridge height, which can cause intonation problems. If you have issues setting up your bridge or keeping the guitar in tune, then the best thing to do is check with the company that made your bridge for specific setup and maintenance instructions.
Fixed Bridge
Fixed bridges are found on electric guitars that don’t have a whammy bar. They don’t move, except to make string height and saddle adjustments. These are the easiest bridges to set up and keep the intonation spot-on. It’s usually just a matter of properly adjusting the saddle height and distance from the nut.
Related article – Tune-O-Matic Vs Wrap-Around Bridge: Exclusive Comparison!
Vibrato Bridge
Vibrato bridges are designed to vary the string pitch up and down by using a whammy bar (aka vibrato bar). This bridge is sometimes mistakenly called a tremolo, which varies sound volume, not the pitch.
For more info, see Kramer Baretta Review – Great Playability And Awesome Sound!
Some players don’t like using a whammy bar, so they don’t even attach it to the bridge. If you play like this, keep enough tension on the vibrato springs to pull the bridge plate tight against the guitar. This will give you the best tuning stability.
With vibrato bridges, the bridge plate can be set up to sit tight against the guitar’s body or “float” above the body of the guitar. A “non-floating” bridge only moves in one direction, so you can only lower the pitch of the notes, not raise them.
The advantage of a floating bridge is that it moves in both directions (up and down), so you can raise and lower the pitch of your notes. Many players struggle to set up their bridge properly so that it floats without going out of tune in the middle of a song.
If you use a whammy bar, then it’s a good idea to lubricate the bridge plate pivot points, especially if you have a non-vintage vibrato plate that pivots on two bolts.
See 2 Vs 6 Point Tremolo Bridge – The Ultimate Comparison! for more info.
In this Video from the Fender Custom Shop, Master Builder Paul Waller shows you how to set up a Strat bridge so that it floats and stays in tune. This is one tip you can take to the bank!
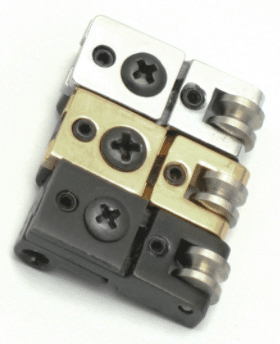
Bridge Saddles
Bridge saddles keep your strings properly spaced in relationship to each other, hold the strings at a fixed height, and may allow you to adjust intonation by changing the string length from the bridge to the nut.
Saddle height should be adjusted to give you the action you like while preventing picked strings from buzzing and matching each string’s height to the fingerboard radius of your guitar neck.
Some saddles also allow you to adjust string intonation. If fretted notes on a string are flat, move the saddle toward the headstock. If they are sharp, then move the saddle in the opposite direction.
Guitar strings do not typically move over the string saddles while you are playing unless you have rollers on them. This means that you typically don’t need to lubricate your saddles where the strings sit on them.
If you have one of the old Kahler vibrato bridges with rollers on the bridge saddles, they should be lubricated to spin freely.
Some people say that lubricating your bridge saddles can decrease string breakage during bending or vibrato bar use. Graphite saddles are available that minimize string breakage without the need for lubrication.
For more info see Titanium Guitar Saddles – Make Your Guitar Sound Fantastic!
If you have string breakage, then check to make sure that there are no burrs or sharp edges at the contact point between the string and the saddle, especially if the saddle has a string groove.
There are generally two types of bridge saddles, dedicated-string saddles, and shared-string saddles.
Dedicated-String Saddles
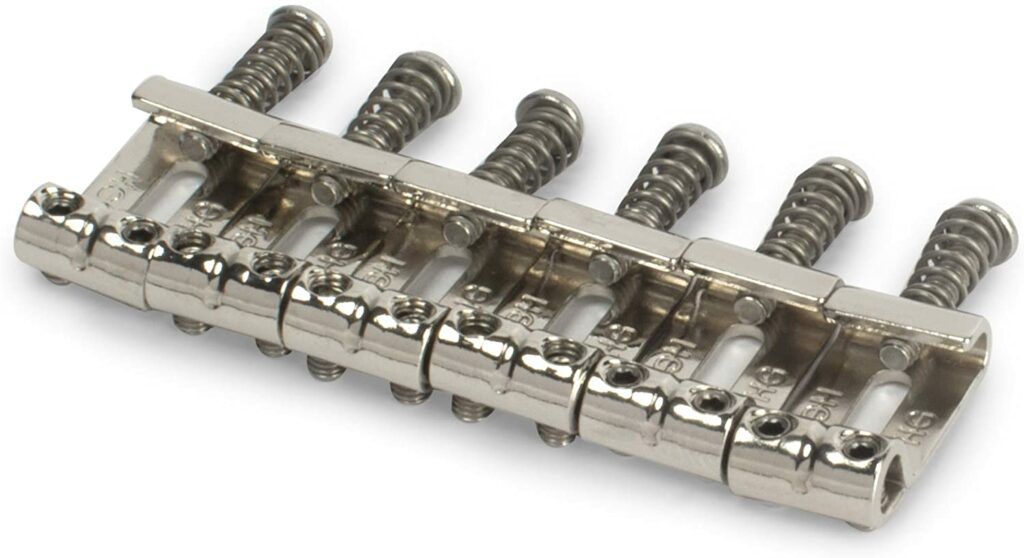
Dedicated-string saddles are the best for accurate intonation because each saddle only holds one string, like on a Stratocaster bridge. Therefore, each string’s length from the saddle to nut, and its action (fingerboard height), can be individually adjusted.
Shared-string saddles support 2 or more strings on one saddle, like on vintage Tele bridges. The downside is that the height and intonation of each string are not totally individually adjustable. However, a shared saddle may have more mass, which can increase sustain and improve tone.

To address this problem, “compensated” bridge saddles are available to improve string intonation by angling them just the right amount. The angle for each saddle is specifically chosen to accommodate that set of two strings. It is important not to mix up the position that each saddle installs on the bridge plate, or it will affect the intonation.
Adjusting String Height (Action) At The Bridge
When adjusting string height at the bridge first set the height of the 1st and 6th string then set the height of the remaining strings so that they follow the fretboard radius of the guitar. Sometimes I like to set the height of my 1st and 6th string a little higher or lower. for the sake of playing comfort, since I have small hands.
Here is the action that I generally prefer, measured at the 17th fret, which may vary according to the nut slots’ depth for these two strings. Avoid fret buzzing, which can throw off your tuning and intonation.
| Neck Radius (Inches) | 6th String Height | 1st String Height |
|---|---|---|
| 7.25″ | .05″ | .06″ |
| 9.5″ to 12″ | .06″ | .06″ |
| 15″ to 17″ | .06″ | .05″ |
Types Of Guitar Lubricant
There are many types of lubricants available for your guitar’s hardware, neck, and strings. Using the wrong type of lubricant can cause harm to your guitar, especially on the neck.
Hardware Lubricant
Hardware lubricant is used to keep parts from wearing out too soon and keep your guitar in tune. This type of lubricant is primarily for machine heads, string trees, nuts, and bridges.
Most available products are graphite or graphite-based. A pencil can be used to lubricate the nut but for other areas, get a high-quality grease-based product like “Guitar Grease” from StewMac or Big Bends “Nut Sauce.”
String Lubricant
String lubricants do not really keep your strings in tune unless they contain a cleaner. They minimize the sound of “string squeak” and may allow you to play faster by decreasing string friction. Planet Waves “XLR8” is a string lubricant that will also clean your strings. You can also use GHS “Fast Fret,” which has been around for years.
I starting using Fast Fret way back when I was in high school. I was obsessed with speed and thought it would make me play faster, but I barely noticed the difference. I kept using it (and still do) because it did make my strings last longer.
It’s true that dirty strings may be more difficult to keep in tune and can create problems with intonation. Keeping your strings clean can make them sound better longer and prolong string life. Remember to clean the undersides of your strings, not just the tops.
Neck Polish

Cleaning and polishing your neck will not help keep your guitar in tune unless you pay close attention to fret care. Dirt and grime build-up on the top of frets can throw off intonation and shorten string life. Keeping your neck and fretboard clean will make your playing experience more enjoyable and help maintain your instrument’s value.
Maple Fretboards And Necks
To clean and polish a finished maple fretboard and neck, use an all-purpose pump polish like “Dunlop 65 Guitar Polish And Cleaner.”
Unfinished maple fretboards and necks should just be wiped down with a microfiber cloth after each use. Do not use oil-based products, especially lemon oil. If liquids seep into the fretboard wood, they can loosen your frets.
Rosewood And Ebony Fretboards
Rosewood and ebony fretboards should be cleaned with 0000 steel wool and wood oil soap, cleaning with the wood’s grain (from the top to the bottom of the neck). After cleaning the fretboard, you can polish it with a small amount of lemon oil, like Jim Dunlop “6554 Dunlop Ultimate Lemon Oil.”
For more info, see Guitar Polish Review – 8 Best Products To Shine And Protect!
Temperature Change
Temperature change can have a significant effect on your guitar’s tuning. Generally speaking, electric guitars are more resistant to climate change than acoustic instruments. There are two types of temperature change: seasonal climate change and situational temperature change.
Seasonal Climate Change
As the climate changes in your area of the world, it can affect your guitar’s tuning. I live in New England, where there are four distinct seasons, spring, summer, fall, and winter. I have to readjust my guitars each season to keep them in tune. Usually, just a small truss rod adjustment will take care of, but sometimes I might also need to make a bridge adjustment.
The bigger the temperature change, the more likely your guitar will require an adjustment. In my particular case, this is from the end of winter to the middle of summer and once again from the end of winter to the beginning of summer. Unless we have an unusually hot or cold season, then it happens like clockwork.
If you only have one guitar, your best bet is to get your seasonal adjustments done by a professional. If you have many guitars, you should consider learning how to make these adjustments on your own, saving you a considerable amount of time and money.
Ideally, you should evaluate and adjust a guitar whenever there is a seasonal climate change. Some guitars may require adjustment as many as four times a year, while others can be done as little as once yearly. If you make yearly adjustments, then synchronize it to something to act as a reminder. What I recommend is to do it every April, which is International Guitar Month. See International Guitar Month – Best 10 Ways To Celebrate It.
Situational Temperature Change
A situational temperature happens when your instrument is taken from one environment to another that is significantly hotter or colder. This temperature change is temporary, so it does not require an actual guitar adjustment, just an equilibration.
The key is to let the guitar equilibrate to the new temperature before playing it, if possible. If you retune the guitar immediately, it will probably go out of tune again during your performance as it adjusts to the new environment. The best approach is to leave it in its case for about 20 to 30 minutes before you use it, tune it once, and you’re ready to go!
Storing Your Guitar In A Controlled Climate
Storing your guitar with the proper temperature and humidity is essential for keeping it sounding and playing correctly! According to Fender, the ideal temperature range for storage is 66-77 °F (19-25 °C) with an ideal humidity of 40-50 percent.
For more info, see How To Store A Guitar – Avoid These Mistakes To Keep It Safe.
Capo Tension And Position
Your capo tension and position can make your guitar sound out of tune, especially if you have jumbo frets. When you use a capo, you should only tighten it up enough to get a clear sound from the strings with no buzzing.
If you tighten it excessively, you can actually bend the strings and cause some notes to sound sharp (too high-pitched). If you can’t seem to get the strings to pitch correctly, then place the capo directly over the fret instead of behind it, and this should solve the problem.
Playing Mechanics

Your playing mechanics can change the tone and pitch of the notes you play, for better or worse! Learning how to hold the guitar in the proper orientation and play it correctly when you are first beginning can spare you many of these problems.
We have all seen players who retune their guitar almost constantly, between each song and in the middle of songs. Chances are their guitar is in tune, but their playing mechanics are making it sound out of tune.
Music Type And Playing Position
Depending on the type of music you play and the position you play it in, you may need to change your body mechanics to get the best sound and stay in tune. For example, if you play classical music, you will most likely best seated with a footrest to elevate your left leg to put the guitar neck in the proper position.
If you play standing up, your guitar strap’s length becomes an important factor in placing the guitar at the proper height, which is determined by things like your arm length and your playing style.
Fretting-Hand Mechanics
Always try to fret notes precisely and with the right amount of finger pressure. The faster you play, the more difficult this can become. When learning a new song, begin at a slow tempo and build up speed progressively, keeping the sound of each note pristine.
Picking-Hand Mechanics
Your picking hand transfers energy to each string. The position and function of this hand are critical! If you play with a guitar pick, then the way your hold it and strike the strings will change your sound dramatically. Striking the strings too hard can make them go out of tune or temporarily sound out of tune.
If you fingerpick the guitar, your hand, wrist, and finger mechanics will be totally different. People with long fingernails pick differently than players with short ones, etc.
Most importantly, you need to make both hands work together properly to get the best sound and tuning stability. Whenever you practice, try to be aware of this relationship, and notice what works best for each of your guitars.

Final Thoughts
If you want your guitar to sound and play great, then you have to be sure to eliminate all problems with tuning and intonation. The best way to do this is to examine your guitar systematically using the top to bottom (headstock to bridge) approach.
Even brand new guitars can be set up incorrectly and require adjustment to play in tune. If you buy your instrument at a music store with a repair shop, ask the owner if he will give you a free setup before purchasing the guitar.
Different types of guitars and guitars of different ages can develop unique tuning problems. Vintage instruments may require hardware repair or replacement.
The way you clean, lubricate, and polish your guitar can be critical, especially regarding the neck. Always use high-quality products to ensure the best results.
Be aware of the effect that geographic climate can have on your guitar, especially temperature and humidity. Your instrument may require seasonal guitar setups.
Never attempt to make adjustments or modifications to your guitar if you do not know how to do it or don’t have the proper tools. You could do permanent damage to the instrument and void the warranty.
Improper playing mechanics can make your guitar sound out of tune. Pay close attention to your playing position and hand mechanics. Different guitars may require different playing mechanics. If you play in the sitting and standing positions, then it’s important to practice both ways.
Speaking about mechanics, always make sure that your guitar has a good mechanical connection to your strap. See Best Guitar Strap Lock System Review – The Top 10 Winners!
Also see, Guitar Repair Maintenance Kit – You Need 8 Essential Things!

Tell Us What You Think
Please let us know what’s on your mind in the comment section, or if I can help you with anything.
- Do you have any additional tips or suggestions for keeping a guitar in tune?
- What are you currently doing/using to keep your guitar in tune?
- How have you solved a particular tuning or intonation problem in the past?


I bought my American Deluxe Fender Stratocaster and had my local guitar shop set it up initially. They immediately took off the whammy bar and told me to not use it if I want it to stay in tune. So, it has sat in my case and I have never even experimented with it due to wanting my guitar to be in tune. So, for the most part, it is very consistent in being in tune. Oh, and it has locking tuners which I think greatly help too. This guitar has been amazing in this respect.
Do a lot of people that own Fenders also ditch their whammy bar? Have you heard of this?
Hi Dan,
Thank You for your comments!
That’s very interesting information. You have a great guitar and the fact that it has locking tuners means that it can be easily set up to stay in tune with a whammy bar. My question is would you use a whammy bar in your playing style. If you wouldn’t use it then leave the guitar just as it is. If you want to try the whammy bar then watch the video in this article from the Fender Custom Shop and set your bridge up exactly like that.
Just use some graphite in your nut (assuming it’s not a roller nut or locking nut) and everything should work just fine. You can use a pencil to add graphite to your nut slots.
Have fun playing!
Frank
Frank,
I will definitely try your ideas thanks for the help. I am always learning more about the guitar.
You are most welcome, Dan!
Let me know if there is anything else that I can help you with.
Frank
This is great information. My son just got his first electric guitar and is taking lessons. I know that he will need to start tuning it and am not sure if that would be extra in the lessons. So, I will send him this link as it really has all the information that he will need to to decide on a tuner.
Hi Leahrae,
Thank You for your comments!
That’s really great that your son started playing the guitar! He might really like this website, as it is all about everything guitar, and he should find some useful information here.
Frank